Packing up your kitchen can feel like a daunting puzzle — stacks of plates, a maze of gadgets, and a labyrinth of spices all vying for space. But with the right approach, this chaotic chore transforms into a smooth, even satisfying process. Whether you’re gearing up for a move, remodeling, or simply reorganizing, mastering efficient packing techniques can save you time, protect your favorite items, and lighten your load. Dive into these six clever hacks that will turn your kitchen packing from a stressful scramble into a streamlined success.
Table of Contents
- Maximizing Space with Smart Container Choices
- Organizing Utensils for Quick Access and Safety
- Keeping Fragile Items Secure During Transit
- Labeling and Grouping for Effortless Unpacking
- Utilizing Vertical Space and Unusual Gaps
- Prepping Appliances and Electronics for Moving
- Q&A
- In Retrospect
Maximizing Space with Smart Container Choices
Choosing containers that fit both your kitchen essentials and your available storage is crucial to maintaining an organized space. Opt for clear, stackable containers which allow you to easily see contents without opening lids, reducing clutter and saving time. Containers with multiple compartments offer an excellent way to segregate small items like spices or baking ingredients, keeping everything accessible without overwhelming your shelves.
Don’t underestimate the power of shape and size when selecting containers. Rectangular or square containers make the most of tight spaces, fitting snugly side by side without leaving wasted gaps. Meanwhile, versatile containers that nest inside one another when empty allow you to free up shelf space when not in use. Below is a quick guide to some smart container choices that balance efficiency and functionality:
| Container Type | Ideal Use | Space Benefit |
|---|---|---|
| Stackable Acrylic Jars | Dry goods & spices | Visual clarity and compact stacking |
| Collapsible Silicone Bowls | Mixing and storage | Fold flat when empty |
| Modular Bento Boxes | Snacks and meal prep | Compartmentalized & space-saving |
- Label containers for quick identification.
- Prioritize stackable designs to maximize vertical space.
- Use airtight lids to keep ingredients fresh and avoid spills.
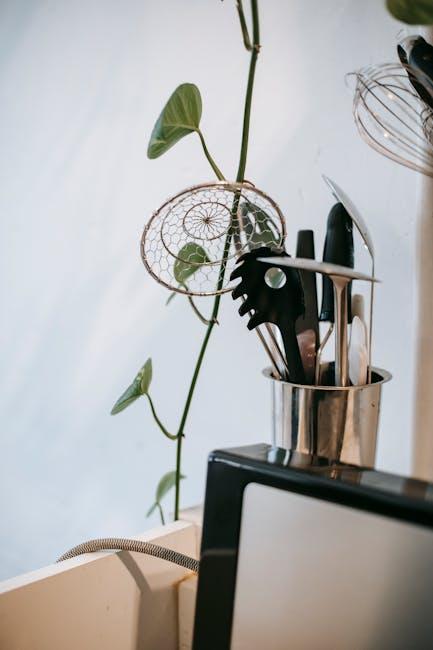
Organizing Utensils for Quick Access and Safety
Streamlining your kitchen setup begins with a smart strategy for placing utensils. Choose containers or drawer organizers that allow you to separate items by function—think knives, spoons, spatulas, and measuring tools. Grouping similar utensils together creates a visual order that reduces time spent digging around. Opt for clear or labeled holders to instantly identify what you need without rummaging. This not only speeds up cooking but minimizes the risk of unwarranted cuts or scrapes, ensuring a safer environment for you and your loved ones.
Consider investing in multi-tiered racks or wall-mounted magnetic strips for sharp tools like knives. These solutions keep blades away from drawer clutter but close at hand, preventing accidents. Here’s a simple comparison to guide your choice:
| Storage Type | Advantages | Safety Level |
|---|---|---|
| Drawer Organizers | Keeps utensils grouped and out of sight | High |
| Magnetic Knife Strips | Easy access, blade protection | Very High |
| Utensil Jars & Holders | Quick grab, decorative decor | Moderate |
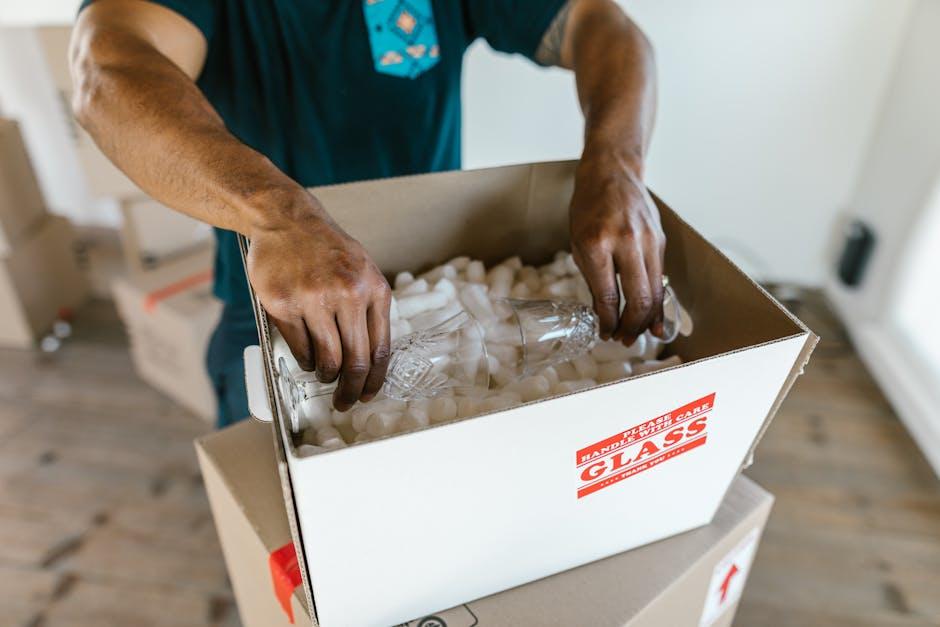
Keeping Fragile Items Secure During Transit
When it comes to protecting your delicate kitchenware, strategic cushioning is key. Wrap each fragile item individually with materials like bubble wrap, packing paper, or even soft kitchen towels. This creates an essential buffer against bumps and knocks during transit. For extra security, nest fragile items inside larger containers filled with cushioning bits such as crumpled paper or foam peanuts, preventing movement within the box. Remember, layering is crucial — start with a sturdy box, add cushioning at the bottom, then place your wrapped item, and top with more padding before sealing.
To maximize protection and organization, consider using a sectioned packing method. Plenty of damage happens when fragile items collide inside a box, so separating them limits this risk. You can use cardboard dividers or repurpose egg cartons to hold glasses, mugs, or small bowls upright and apart. Label each box clearly with “Fragile” and “Handle with Care” notices to alert anyone lifting or stacking. Here’s a quick reference table for common fragile kitchen items and ideal packing materials:
| Item | Recommended Wrapping | Cushioning |
|---|---|---|
| Glassware | Bubble wrap | Foam peanuts or crumpled paper |
| Plates | Packing paper, wrapped individually | Cardboard dividers |
| Ceramic Bowls | Kitchen towels or bubble wrap | Soft foam or towels |
| Mirrors & Frames | Plastic wrap plus padding | Foam sheets |

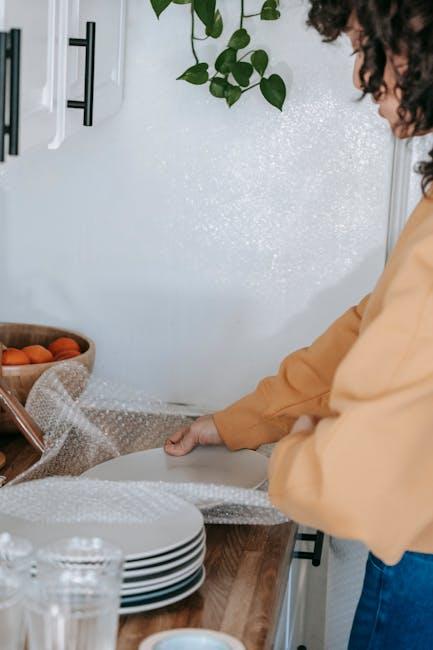
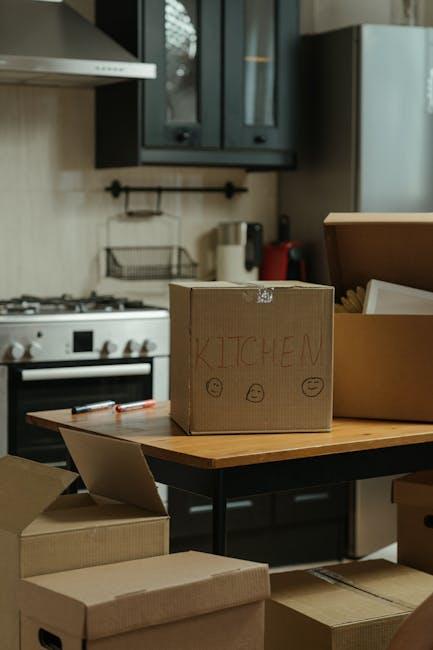
Labeling and Grouping for Effortless Unpacking
When it comes to unpacking, having a pre-planned system can save you hours and heaps of frustration. Start by labeling each box clearly and specifically—generic tags like “kitchen” won’t cut it. Instead, try labels that describe contents and room placement, such as “Spices & Condiments — Pantry Shelf” or “Glassware — Dining Cabinet.” Color coding with markers or stickers can further streamline the process, instantly conveying priority or fragility at a glance.
Grouping items before you pack ensures a smoother transition from box to cupboard. Think beyond utensils and stack like items in bundles optimized for the space they’ll occupy:
- Cooking essentials: Pots, pans, and lids together, ready for stove setup
- Dining ware: Plates, bowls, and cutlery grouped by use
- Baking basics: Mixing bowls, measuring cups, and bakeware in one box
Using this thoughtful system helps you unpack by section, reducing the chaos and getting your kitchen functional sooner.
| Color Code | Box Contents | Unpacking Priority |
|---|---|---|
| Red | Daily Use Items | High |
| Blue | Storage & Containers | Medium |
| Green | Backup Supplies | Low |
Utilizing Vertical Space and Unusual Gaps
When every inch of your kitchen counts, thinking vertically can transform cramped shelves into spacious storage havens. Utilize tall, narrow racks or tiered organizers to stack items without sacrificing accessibility. Hanging hooks or magnetic strips on the insides of cabinet doors are perfect spots for utensils, measuring cups, or spice jars, turning overlooked surfaces into handy storage zones. Additionally, consider stacking nesting bowls or using expandable shelf inserts to make the most of vertical real estate within cabinets.
Unusual gaps—those sneaky spaces between appliances, countertops, or corners—often go neglected but can serve as surprisingly efficient storage spots. Slim rolling carts can slide effortlessly into these narrow crevices, becoming perfect homes for canned goods or baking sheets. Even small baskets or bins can keep these gaps tidy while holding smaller kitchen essentials. Below is a quick guide on common vertical and gap spaces you can capitalize on:
| Space | Storage Solution | Best For |
|---|---|---|
| Above fridge | Decorative baskets | Bulk dry goods |
| Cabinet door interiors | Hooks & racks | Measuring spoons, lids |
| Between fridge & counter | Slim rolling cart | Spices, oils |
| Under shelves | Hanging baskets | Fruits, snacks |
| Above cabinets | Stacked bins | Occasional-use appliances |
Prepping Appliances and Electronics for Moving
Before you start packing your gadgets and kitchen appliances, it’s crucial to give each one a little TLC to ensure they arrive safely at your new home. Begin by unplugging everything at least a day before moving to allow any residual power to dissipate. For refrigerators and freezers, empty and defrost them 48 hours in advance to prevent leaks and odors. Don’t forget to clean all appliance surfaces with a damp cloth—this makes packing easier and keeps pests away during transit.
When it’s time to pack, use thick bubble wrap or specialized appliance pads to cushion your electronics and appliances. Secure loose parts like cords, trays, or removable shelves in clearly labeled bags and tape them securely to their respective appliances. Organize items with a simple packing strategy:
- Label cord bundles with corresponding appliance names for quick setup later.
- Wrap screens and control panels separately to avoid scratches.
- Fill any gaps inside appliances with soft towels or foam sheets for added protection.
| Appliance | Pre-Move Tip | Packing Material |
|---|---|---|
| Microwave | Remove the turntable plate | Bubble wrap + small box |
| Blender | Take apart blades carefully | Cushioned wrap + small box |
| Printer | Remove ink cartridges | Plastic wrap + box |
Q&A
Q&A:
Q1: Why is packing the kitchen one of the hardest parts of moving?
A: The kitchen often holds the most diverse and delicate items—sharp knives, fragile glassware, bulky appliances, and innumerable small gadgets. Coordinating all these different shapes, sizes, and fragilities into one efficient packing system can feel like a complex puzzle.
Q2: What’s the first hack to make packing kitchen items easier?
A: Start by decluttering. Before packing a single item, sift through your pantry, fridge contents, and utensils. Toss expired goods, donate duplicates, and set aside rarely used gadgets. A lighter load means less to pack and unpack, making the entire process smoother.
Q3: How can I protect fragile kitchenware without spending a fortune on bubble wrap?
A: Newspapers and dish towels are your best friends! Line boxes with towels or use clean, crumpled newspaper to cradle plates, glasses, and ceramics. Towels double as both padding and space savers by wrapping around individual items or filling in gaps in boxes.
Q4: Is there a clever way to pack appliances and cords?
A: Yes! Wrap cords with twist ties or Velcro strips to keep them neat. For appliances, pack smaller ones inside larger ones if possible, cushioning carefully in between. Use the original boxes if available, or sturdy kitchen-sized boxes to keep them safe and contained.
Q5: How can I keep my spices and pantry organized during the move?
A: Consolidate spices into a smaller container or use a muffin tin to keep small jars together securely. For pantry items, group similar goods together and pack them in sealable bins or boxes labeled by category, like “baking” or “snacks,” so unpacking is a breeze.
Q6: What’s the best strategy to unpack the kitchen efficiently?
A: Pack an “Open First” box with essentials like a few plates, utensils, a pot, a coffee maker, and some basic spices. This way, your first day in the new place allows you to cook and eat comfortably without digging through every box. Unpack by zones—start with food storage, then cookware, then utensils—to create a functional kitchen faster.
In Retrospect
Packing up your kitchen doesn’t have to be a chaotic scramble or a mountain of boxes stacked without rhyme or reason. With these six clever hacks, you can transform the process into a smooth and even enjoyable experience, where every spoon, plate, and gadget has its place. Remember, efficient packing is not just about saving space—it’s about setting the stage for a seamless transition to your new home. So take a deep breath, channel your inner organizer, and let these tips guide you toward a kitchen that’s ready to unpack with ease and a little bit of peace of mind.