Moving day is a whirlwind of emotions and activity—boxes piled high, last-minute goodbyes, and the anticipation of a fresh start. Amidst the chaos, one crucial task often slips under the radar: thoroughly cleaning your old home before handing over the keys. A spotless space not only leaves a lasting impression on new occupants but can also help you secure your deposit or simply close this chapter on a positive note. In this guide, we’ll walk you through practical steps and clever tips to make cleaning your old home on moving day efficient and stress-free, turning this often-overlooked chore into a satisfying final act.
Table of Contents
- Preparing Your Cleaning Supplies for Maximum Efficiency
- Tackling High-Traffic Areas with Targeted Cleaning Techniques
- Deep Cleaning Kitchen and Bathroom Spaces for a Fresh Start
- Refreshing Walls Floors and Fixtures Without Causing Damage
- Managing Trash and Unwanted Items During the Cleaning Process
- Final Touches and Safety Checks Before You Lock Up for Good
- Q&A
- Closing Remarks
Preparing Your Cleaning Supplies for Maximum Efficiency
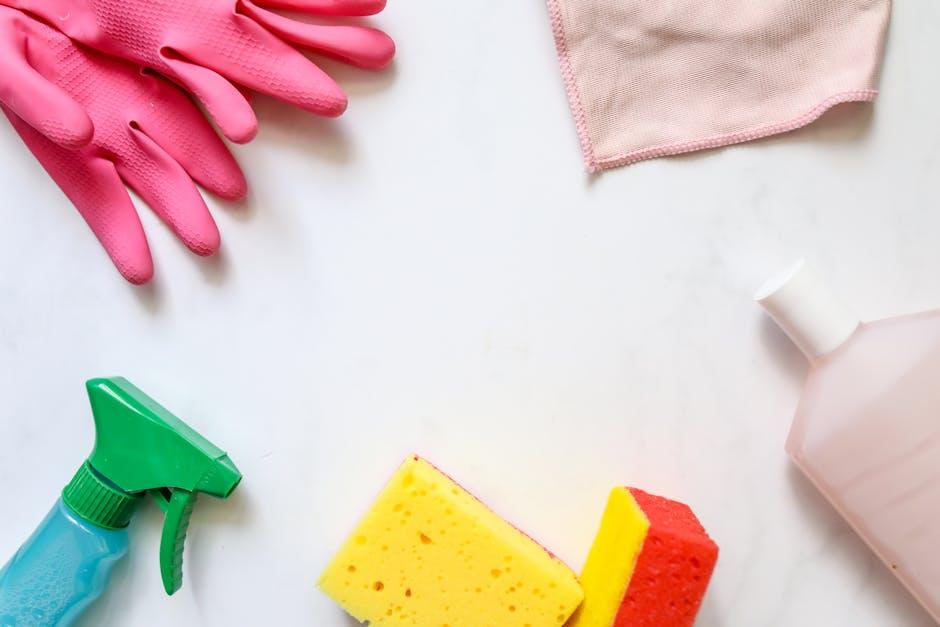
Before diving into the cleaning process, gather all necessary supplies to avoid constant interruptions. Start with a sturdy caddy or portable bucket to keep essentials within arm’s reach. Include multipurpose cleaners, microfiber cloths, scrub brushes, a mop, gloves, and trash bags. Prioritize eco-friendly products when possible—they not only protect your health but also reduce environmental impact. To save time, prep a spray bottle filled with a mixture of vinegar and water for windows and surfaces; it’s a simple hack that cuts down on chemical clutter while delivering sparkling results.
Organizing your supplies effectively can dramatically boost your workflow. Sort items by room or task to minimize backtracking, for example:
- Kitchen: Degreaser, sponges, dish soap.
- Bathroom: Toilet cleaner, grout brush, disinfectant wipes.
- Living areas: Dusting spray, vacuum attachments, lint rollers.
This targeted approach ensures you maintain momentum and finish cleaning promptly. Keep heavier tools like mops and vacuums at the ready but out of the way until needed, maintaining a clutter-free environment that keeps your energy focused.
Tackling High-Traffic Areas with Targeted Cleaning Techniques
High-traffic areas in your home, such as entryways, hallways, and kitchens, often bear the brunt of daily wear and tear. These spots can accumulate dirt, dust, and stains that standard cleaning may not fully remove, especially on moving day when cleanliness signals a fresh start. To restore their charm, begin by vacuuming or sweeping thoroughly to lift loose debris. Then, apply a specialized cleaner suited to the floor type—wood, tile, or carpet—to break down stubborn grime. Don’t overlook the edges and corners where dirt sneaks in unnoticed; use a narrow brush or a microfiber cloth for precision.
Beyond floors, pay close attention to surfaces frequently touched throughout the day. Light switches, doorknobs, and stair railings deserve a detailed wipe-down with disinfectant to ensure a hygienic environment for the next residents. Using targeted techniques like steam cleaning or spot treatment can enhance the effect without wasting effort on the entire area. Consider this helpful checklist for an effective approach:
- Vacuum/Sweep before any wet cleaning
- Choose appropriate cleaners based on materials
- Focus on edges and corners to catch hidden dirt
- Disinfect high-touch surfaces for added safety
- Use steam or spot-cleaning to target stubborn stains
Deep Cleaning Kitchen and Bathroom Spaces for a Fresh Start
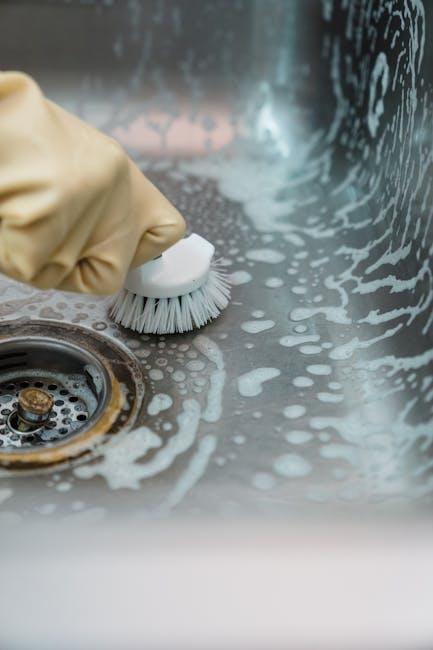
When tackling stubborn grime in your kitchen and bathroom, start by focusing on high-impact areas such as countertops, sinks, and faucets. Use a combination of natural cleaners like vinegar and baking soda or choose heavy-duty commercial products for persistent stains. Don’t forget to scrub under the faucet handles and behind the toilet – these often-neglected spots harbor dirt and bacteria. For tile grout, a mix of hydrogen peroxide and baking soda applied with a toothbrush can dramatically brighten surfaces without damaging them.
Maximize efficiency with a checklist that targets essential tasks:
- Kitchen counters: sanitize and remove all crumbs and spills
- Bathroom tiles: deep scrub grout and walls
- Fixtures and appliances: polish and disinfect
- Drain areas: clear any buildup for smooth water flow
- Cabinet interiors: wipe down shelves and handles
| Cleaning Task | Recommended Product | Time to Complete |
|---|---|---|
| Countertops & Sink | All-purpose disinfectant spray | 15 minutes |
| Tile Grout | Baking soda & hydrogen peroxide paste | 20 minutes |
| Fixtures & Faucets | Lemon juice & vinegar mix | 10 minutes |
| Toilet & Drain | Enzymatic cleaner | 15 minutes |
Refreshing Walls Floors and Fixtures Without Causing Damage
When breathing new life into walls, floors, and fixtures on moving day, it’s essential to choose methods that preserve the charm of your old home without triggering any harm. Avoid harsh chemicals that might erode paint or finish; instead, opt for natural cleaners like diluted vinegar, mild soap, or commercially available gentle solutions designed for delicate surfaces. Lightly wiping surfaces with a soft microfiber cloth helps remove dust and grime without scratching, while testing any cleaner on a small hidden area ensures it won’t cause discoloration or damage.
Maintaining the integrity of antique fixtures and worn floors requires extra care. For instance, hardwood floors can be refreshed by sweeping away dirt and using a damp mop with a pH-neutral cleaner. Fixtures like brass doorknobs or ceramic tiles shine best after a gentle polish using appropriate materials listed below:
- Wooden surfaces: Microfiber cloth, mild soap solution.
- Metal fixtures: Soft cloth, lemon juice with baking soda paste.
- Ceramic tiles: Vinegar solution, soft-bristle brush.
| Surface | Recommended Cleaner | Tip |
|---|---|---|
| Painted Walls | Mild Soap & Water | Test first in a small area |
| Hardwood Floors | pH-Neutral Cleaner | Avoid excess water |
| Brass Fixtures | Lemon & Baking Soda | Polish gently with cloth |

Managing Trash and Unwanted Items During the Cleaning Process
Clearing out trash and unwanted items efficiently is crucial to making your moving day cleanup smooth and stress-free. Start by sorting through every room and designating specific containers or bags for garbage, recyclables, donations, and items to sell. This method prevents clutter from piling up and quickly highlights what needs to be removed from the home. Keep in mind the importance of wearing gloves and using sturdy bags to handle waste safely and hygienically.
To streamline the disposal process, it’s helpful to set up a temporary “waste station” near the exit or garage. This spot acts as a central hub where you can gather everything that’s leaving the house, ensuring nothing is forgotten during the final walkthrough. Consider the following checklist to manage unwanted items effectively:
- Separate hazardous materials like batteries and paint for proper disposal
- Box up donations immediately and schedule a pickup or drop-off
- Label bags and boxes clearly to avoid confusion
- Arrange for bulk trash pickup ahead of time if disposing of large furniture or appliances
| Item Type | Recommended Action | Tip |
|---|---|---|
| Old Paint | Drop off at hazardous waste center | Check local collection dates |
| Batteries | Recycle in designated bins | Store separately to avoid leaks |
| Furniture | Sell or donate if in good condition | Take photos for listing sites |
| General Trash | Bag tightly and place curbside | Confirm pickup schedule |
Final Touches and Safety Checks Before You Lock Up for Good
Before you step out for the last time, invest a few moments in a thorough sweep through every room. Ensure all windows are locked tight and blinds or curtains are left in a neat position to give a good impression for the next occupants. Double-check that all appliances, lights, and water taps are switched off or unplugged to prevent any hazards. A quick walkthrough can help you spot if anything was overlooked, such as leftover garbage or personal items hiding in forgotten corners or drawers. Taking these final steps guarantees you leave behind a home that feels as cared for as the day you first moved in.
It’s also wise to leave behind a note with your forwarding address and contact details in a visible spot—this small gesture can save future headaches for both you and the new owners. Consider jotting down the locations of key utilities like the circuit breaker or water shut-off valve so they have handy references if needed. Below is a simple checklist to confirm your safety and security essentials:
| Task | Completed? |
|---|---|
| Windows and doors locked | ☐ |
| Appliances unplugged | ☐ |
| Lights off | ☐ |
| Water taps fully closed | ☐ |
| Garbage removed | ☐ |
| Contact note left | ☐ |
Q&A
Q&A:
Q1: Why is it important to clean your old home on moving day?
A1: Cleaning your old home on moving day is crucial for several reasons. It ensures you leave the space in good condition for the next occupants, helps you get your security deposit back if you were renting, and provides a sense of closure as you transition to your new place.
Q2: When should I start cleaning on moving day?
A2: Ideally, begin light cleaning tasks before moving day to ease the process. On moving day, after your belongings are out, focus on deeper cleaning. Reserve the final timeframe—once the house is empty—for wiping surfaces, vacuuming, and mopping.
Q3: What are the essential cleaning supplies to bring on moving day?
A3: Bring all-purpose cleaner, microfiber cloths, a broom and dustpan, mop, vacuum, garbage bags, sponges, and gloves. Having a checklist ensures you don’t forget key supplies when time is tight.
Q4: How do I prioritize cleaning tasks as I clear out my old home?
A4: Start by removing trash and obvious debris, then dust and wipe down surfaces, including countertops and cabinets. Clean appliances inside and out, and don’t forget windows and mirrors. Finish by vacuuming or mopping floors to leave the home spotless.
Q5: Can I clean as I pack to save time?
A5: Yes! Cleaning as you pack can be efficient. Wipe down surfaces and clean shelves or drawers before packing them up. This way, by moving day, most areas need only a quick touch-up.
Q6: How do I tackle stubborn stains or tricky spots?
A6: Use specialized cleaners for tough stains or greasy spots—like oven cleaner for ovens or baking soda paste for stubborn grime. Test a small area first to avoid damage and allow time for the cleaner to work before wiping.
Q7: What if I don’t have time to clean everything thoroughly?
A7: Focus on high-impact areas like kitchens, bathrooms, and floors. A quick but effective clean is better than none. You can always consider hiring professional cleaners for a deep clean if needed.
Q8: Should I leave cleaning supplies behind for the new residents?
A8: It’s a thoughtful gesture to leave behind basic cleaning supplies. It helps the new occupants settle in and shows good will, but it’s not mandatory.
Q9: Any tips for maintaining sanity during the cleaning frenzy?
A9: Stay hydrated, take short breaks, enlist help if possible, and keep a checklist to track progress. Music or a podcast can also make the chore more enjoyable and keep energy levels up.
Q10: What’s the final step once cleaning is done?
A10: Do a last walkthrough checking every room, closet, and cabinet to ensure nothing is left behind and the place meets your standards. Finally, lock all doors and windows before handing over the keys with peace of mind.
Closing Remarks
As the final box is packed and the keys are ready to be handed over, a clean home becomes the perfect closing chapter to your time in that space. Moving day cleaning is more than just a chore—it’s a quiet farewell, a way to honor the memories made within those walls while paving the way for new beginnings. With a little planning, elbow grease, and the right approach, you can leave your old home spotless and inviting, making your move all the more satisfying. So take a deep breath, roll up your sleeves, and give your former sanctuary the send-off it deserves—because every ending, after all, is just the start of something new.